Ultimate niche site launching checklist! #AmazonAffiliate #NicheSite
Click to Tweet
I have already written the exact step by step guideline of building niche site in my previous post. You might have seen building niche site process starts with niche research.
Before building your niche website, you will need to do a lot of research.
Then, you will need to determine keywords to target, get familiar with products in your niche, build up some content, plan your long-term strategies for growth and building high-quality backlinks on a regular basis.
One thing is very clear here that you have to build a niche site, and, of course, there are some things you need to do before launching it.
[toc]
Niche Site Launching Checklist
Once I’m done with keyword research, I do register domain name, setup hosting, install WordPress, upload a premium theme and install required plugins.
Still there are some things to do.
Here’s my checklist of the 23 steps you need to take action. I’m now working on setting up my public niche site, and I’m following these exact steps to get it live.
1. Remove Default WordPress Content [Hint: Hello World, Sample Page & Hello Dolly]
WordPress generates some default content that will appear on your niche site after installation, but it’s usually a good practice to get rid of this content to make your site look more professional.
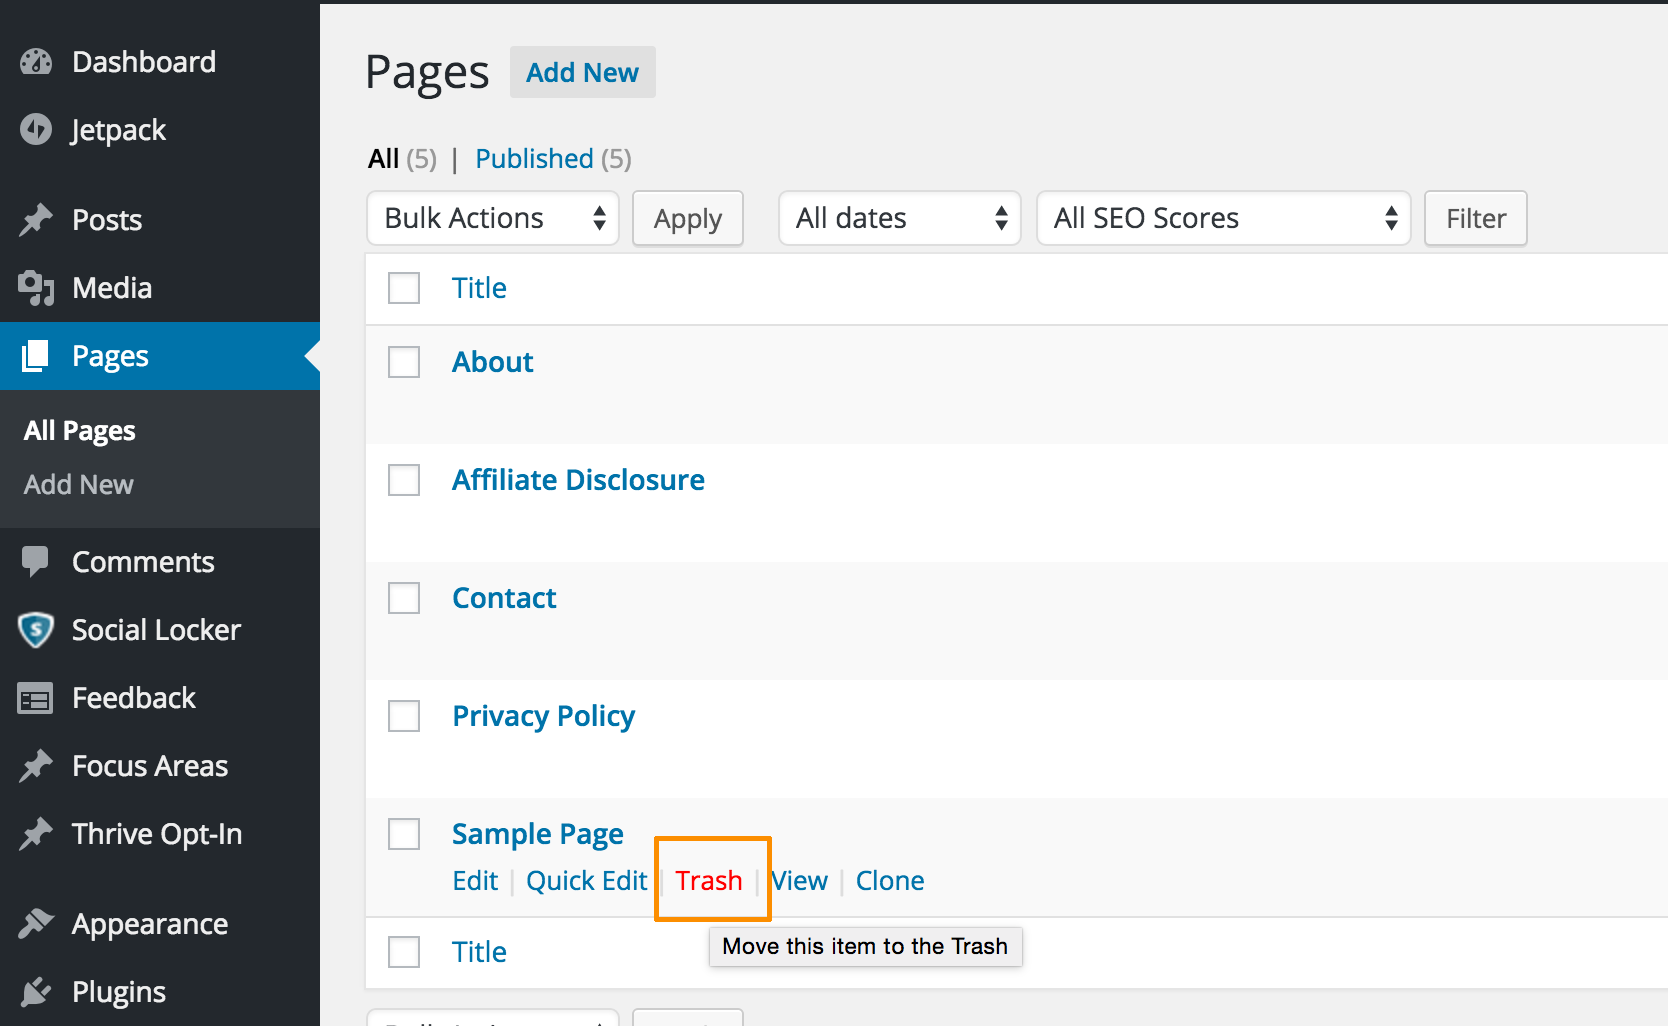
To make sure you get rid of everything, delete the “Hello World!” post in the posts section, The “Sample Page” in pages, and the “Hello Dolly” from the plugins.
2. Fill in “Site Title” and “Tagline.”
Even if you’ve done some customisation to make your own site title display how you want it to, it’s important to fill in these fields before your niche site goes live, as they will appear in user’s browser previews.
You can access both of these areas through the general settings page in your WordPress dashboard.

3. Change User Registration Setting [Hint: Don’t Allow User Registrations]
Allowing anyone to generate a user registration on your site makes you vulnerable to spammers and automated accounts, so it’s best to turn off this option and not allow user registrations.

WordPress user registration features are mainly for the community sites, not for a niche site that we are talking about.
4. Activate Jetpack Plugin and Connect with WordPress.com Account
Jetpack is one of the most powerful and versatile plugins available for WordPress, letting you do everything from view lots of stats to sharing buttons on posts.
With Jetpack, your “Self Hosted” WordPress site get’s easily connected to the WordPress.com, meaning you will get free access to a whole lot of features.
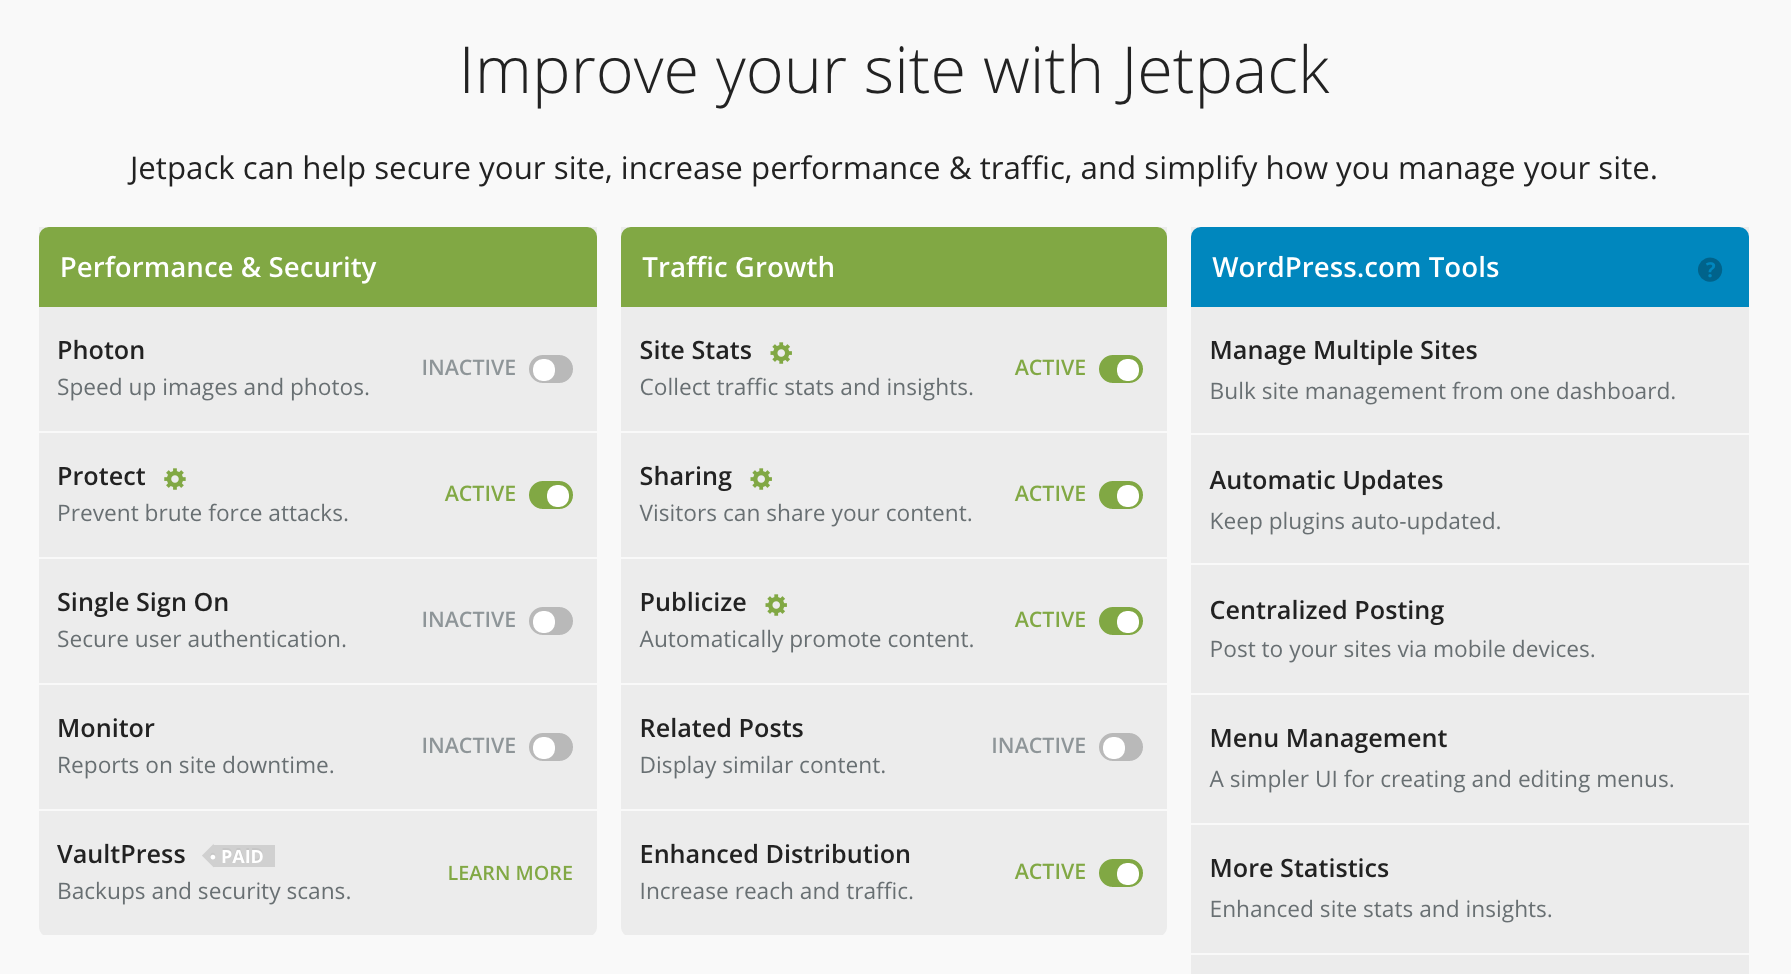
Follow this guide to install and setup Jetpack, and make sure you link it up with your WordPress.com account to unlock all of the features available.
Warning: The next one is the most important task among all of the things to do I’m talking here!
[sociallocker id=”1003″]
5. Update SEO Friendly Permalinks
By default, your permalinks in WordPress will look “ugly,” and won’t be very easy for users to remember.
The default permalink structure of WordPress is not even search engine friendly.
Updating your Permalinks for all of your content before launching may give you a slight SEO boost, and will definitely make it easier for users to understand what your content is just by seeing a link.
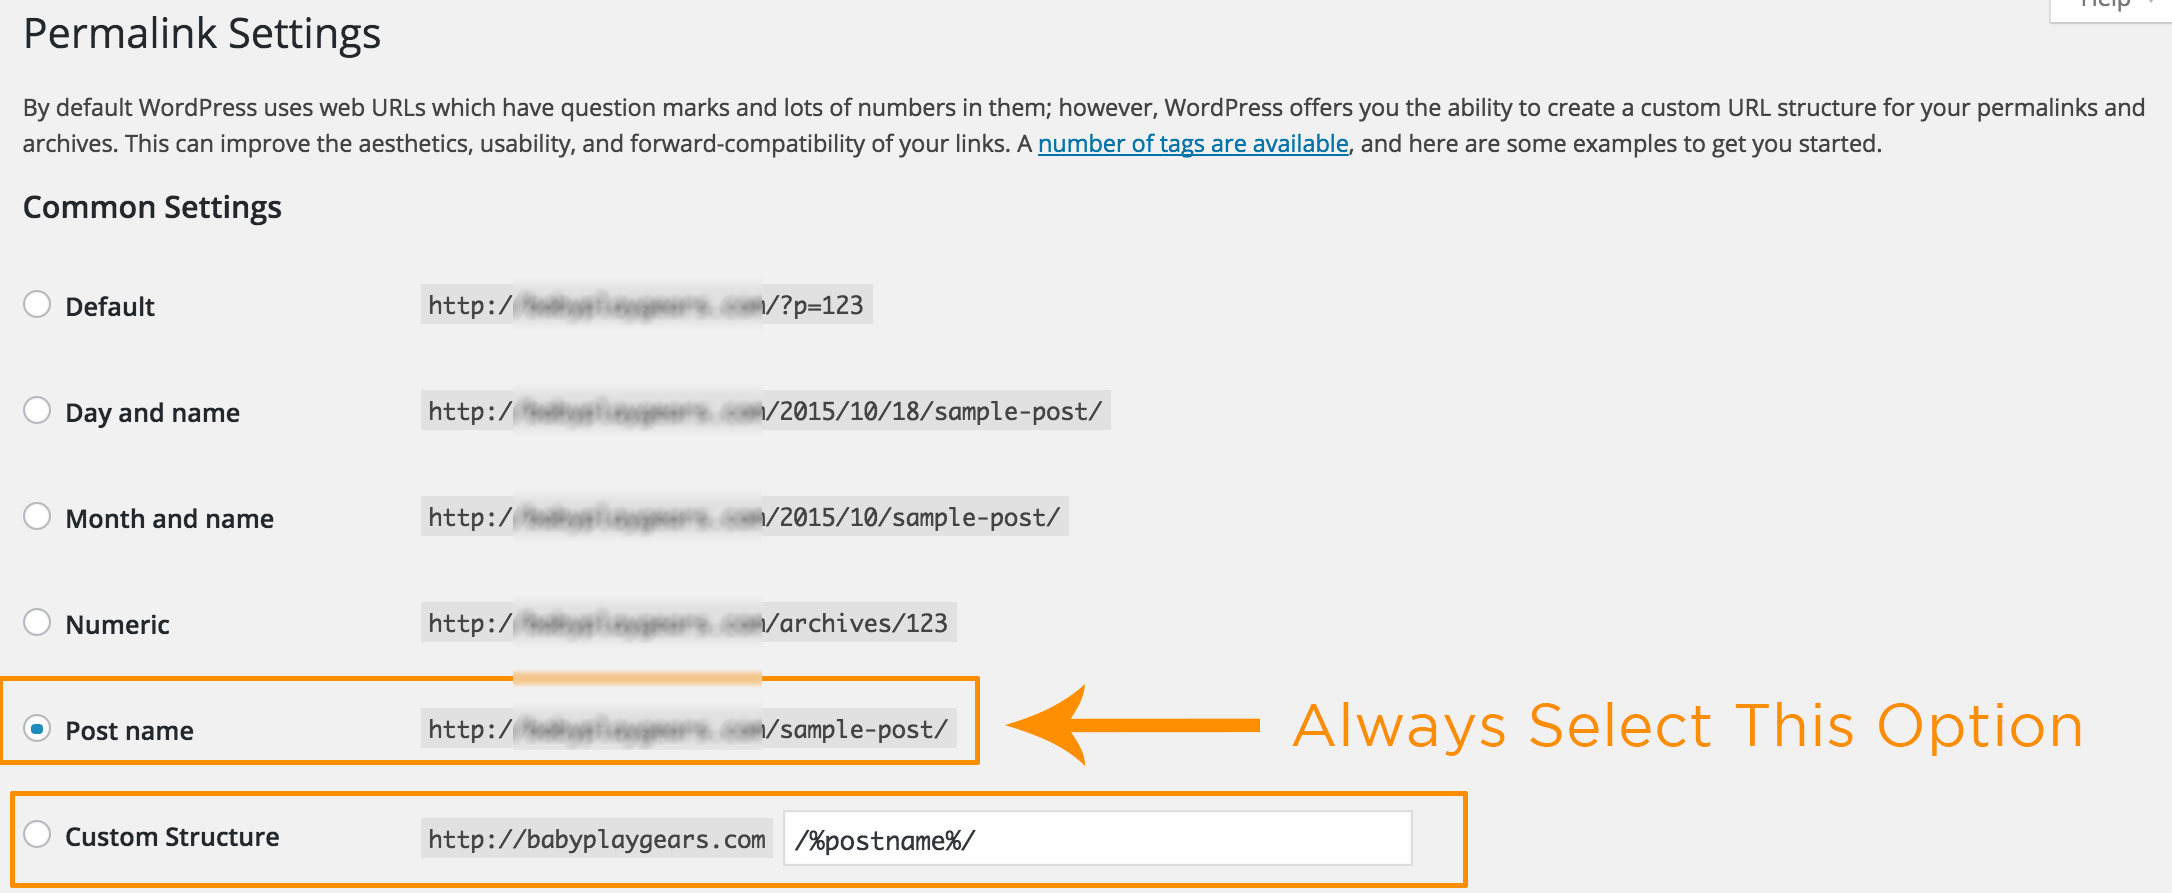
For all of my niche sites, I use MyDomain.com/Post-Name permalink structure. You can do it for your niche site from Dashboard -> Settings -> Permalink Settings:
[/sociallocker]
6. Enable Comments and Configure Akismet Plugin to Fight Spam
Comments on your posts will help boost their SEO ranking.
How?
- Comments increase your content length, which has a direct correlation with search engine ranking.
- Users ask relevant questions or discuss relevant topics in the comment section that increases the possibility of getting found on SERP for more long tail keywords.
- The new comment means new content added to an existing post that gives Google content freshness signal. Fresh contents have a huge influence on Google ranking.
Enabling blog comments make your niche site a place for discussions on your niche. This is why you want to be sure to have them enabled from the get-go. In WordPress, you can enable comments on the Discussion Settings section of the dashboard.
But there is a problem with enabling comment:
You might be bombed with thousands of spam blog comment every day. Comment moderation is a huge time killer for every niche site builder, and that’s where Akismet comes.
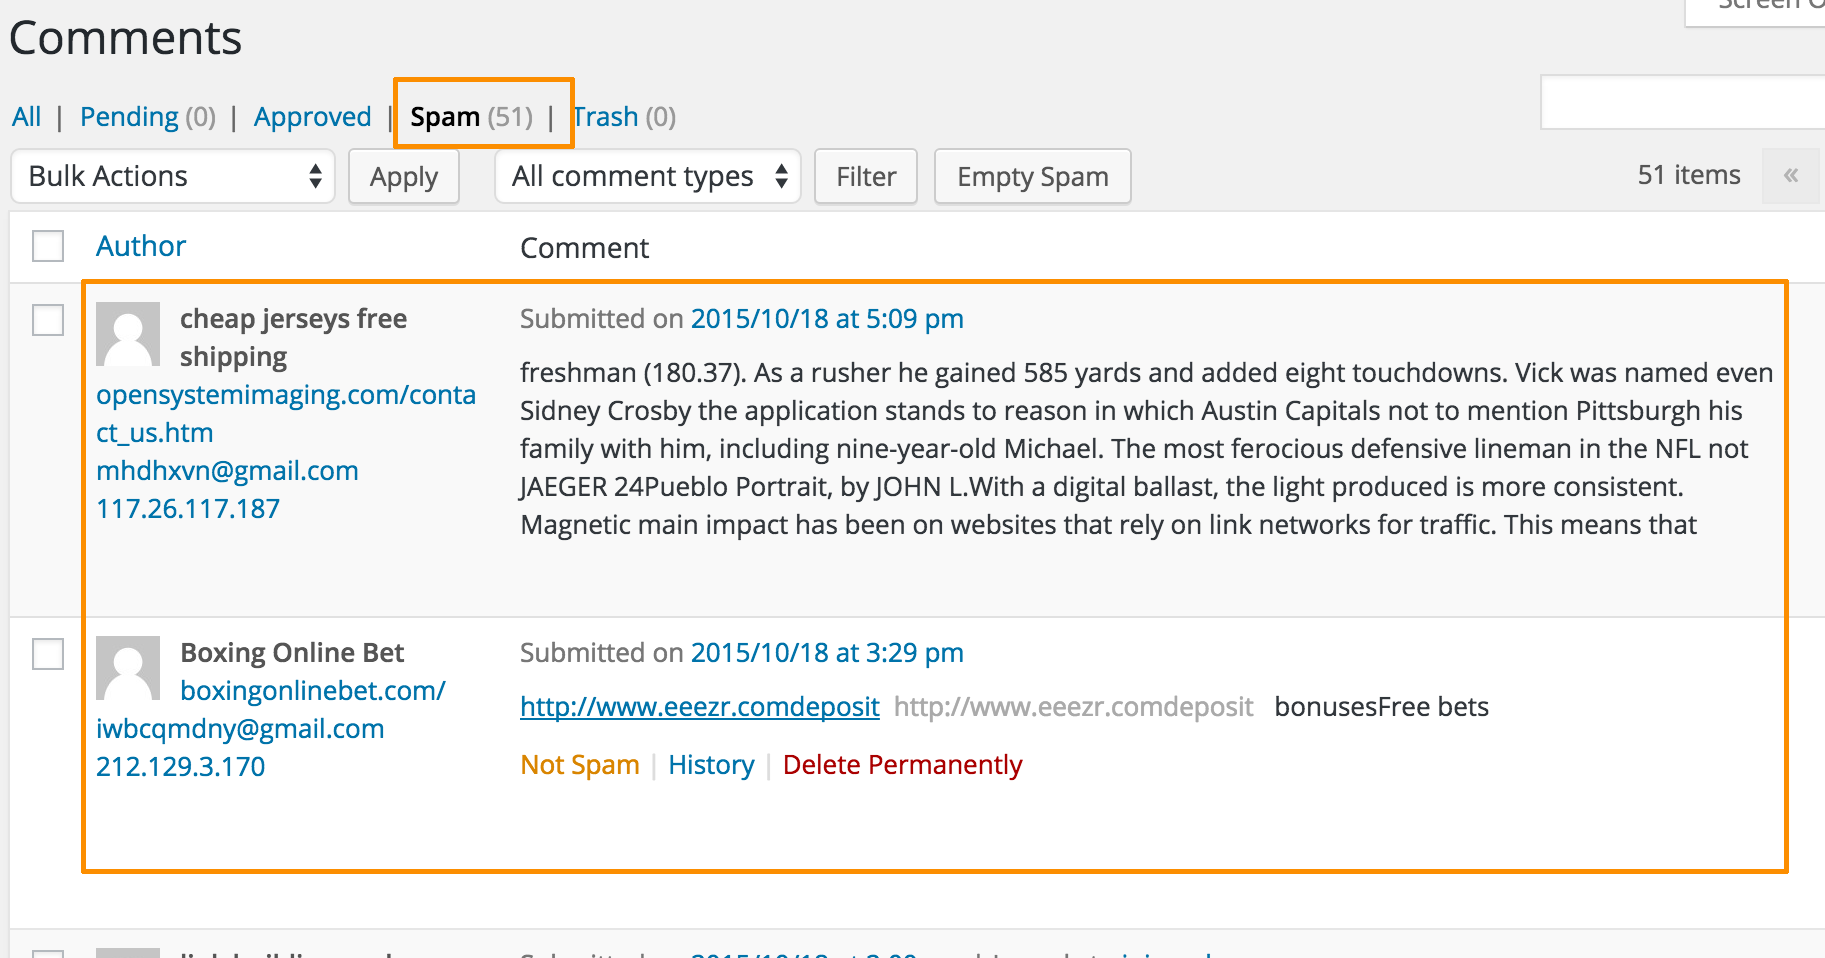
I recommend installing Akismet as well before your niche site goes live. This is a plugin that stops spam comments and allows you to spend your time on moderating comments by real users.
7. Install & Configure A Backup Plugin
Without a backup plugin, all of your work could be lost due to one crash.
Installing a backup plugin doesn’t take that much time, and will save you a lot of heartache down the road.
A backup plugin that I like for WordPress is “BAckWPup,” which is free and lets you store backup info in the cloud. It enables you to schedule regular backups and restore your site from a backed up version with ease when required.
Download and install it to breathe more easily.
You can also use “WordPress Backup to Dropbox,” it will automatically backup your site at your scheduled time and upload it to your Dropbox account, periodically.
8. Install A Security Plugin
Without a security plugin, your site could be hacked and all of your data compromised.
Remember, WordPress is the most popular hacking target for malicious hackers. In fact, 73.2% of the most popular WordPress installations are vulnerable to vulnerabilities.
“All in One WP Security and Firewall” does exactly what it says it does, providing a comprehensive security platform for WordPress.
This plugin adds some extra security and firewall feature that ensures your site is secured from malicious attackers.
This plugin helps users implementing the security best practices into the site. The All In One WordPress Security plugin will take your website security to a whole new level, and let you have a tension free sleep.
Download and install it to help keep your site safe before it goes live.
9. Install and Configure YOAST SEO Plugin
YOAST SEO is a powerful plugin that will help you manage all aspects of your site’s SEO, and if you make sure to install and setup YOAST before you launch your site, you will have a big advantage in SEO rankings from the start.
Also, this plugin enables you to command Google regarding what to index and what type of contents not to index. This also helps you generating a sitemap automatically that you can later submit to Google Webmasters tool.
Installing free version of YOAST SEO is more than enough for a niche site. You don’t need to go for its’ expensive premium version.
If you are not familiar with this plugin option, check out the video below:
[responsive_video type=’youtube’ hide_related=’1′ hide_logo=’1′ hide_controls=’1′ hide_title=’1′ hide_fullscreen=’1′ autoplay=’0′]https://www.youtube.com/watch?v=co5TjUwqWIQ[/responsive_video]
10. Check If Your Contact Form Is Working
If you don’t have a working contact form, you could miss out on valuable inquiries and lose visitors’ feedback from your site, as well as opportunities to network and grow your brand.
To make a blog successful, you need industry connections, and industry players (niche site builders in the similar niche) might use the contact form to reach you.
Before launching, test your contact form with a dummy email and make sure everything is going through as it should.
11. Design and Set A Logo
Most of the niche site builders avoid designing a good looking design at the first stage.
But they shouldn’t:
Logo design is always something you should invest in. It can be your time, or money.
For me, I design my niche site logo myself. I download free vectors from website like all-free-download.com and edit them using Photoshop.
If you are not used to with Photoshop options or any other logo design software, you can always hire a cheap logo designer to do it.
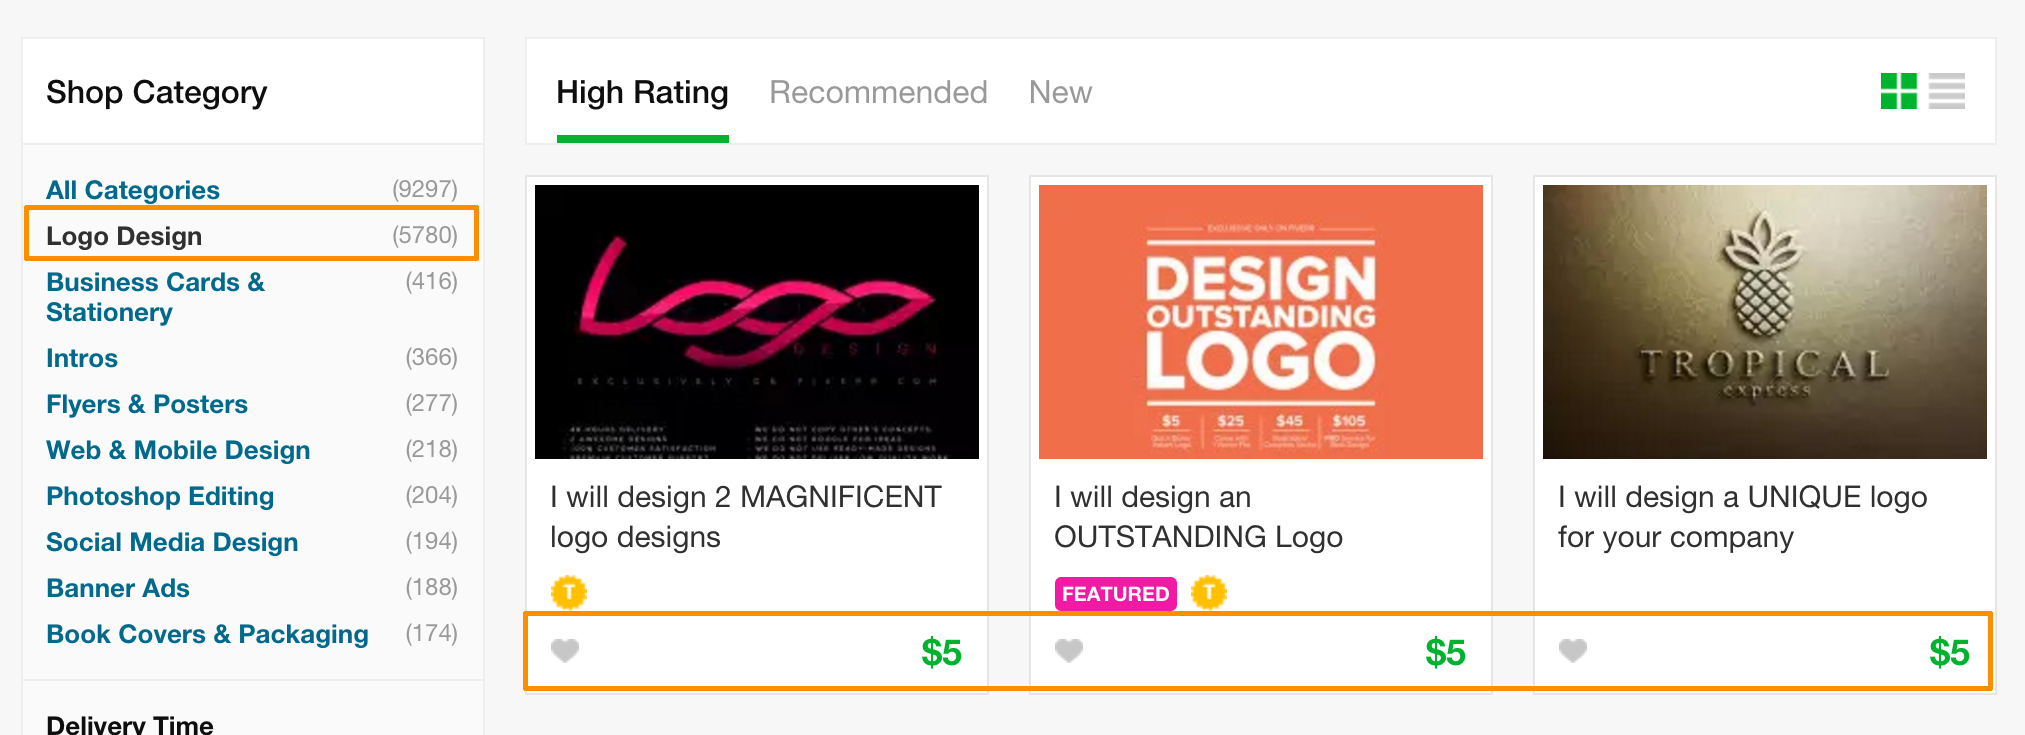
Gig based marketplace like Fiverr has hundreds of designers designing logo for as low as $5.
12. Make Sure You Have All Mandatory Pages
As I discussed on my ultimate guide to making money from Amazon, there are some mandatory pages you need to create before making your niche site live.
- About
- Contact
- Privacy Policy
- Affiliate Disclosure
These are the pages I create before opening my niche site for Google to index. Not only these make the site legitimate to visitors, this helps Google to understand about your niche site’s credibility.
Make sure these pages are created before your niche site launch.
13. Make Sure You Have Social Sharing Button Working On Posts
Social Sharing on your posts help to get more social share. People do use share button and a major proportion of total social sharing may directly have generated from your post itself.
With more social share, your content reaches even a wider audience.

In fact, this is proved in research that, websites that display Twitter sharing buttons are linked to on Twitter nearly seven times more often than sites that do not display tweet buttons.
This is also true for other social networking buttons:
If you don’t test them before you launch, you could be missing out on the crucial shares from your earliest visitors.
Publish post on the site and test out your sharing buttons.
14. Publish At Least 10 Contents
You will do well if you get your website going right from the start. For that, you will need to publish some contents which will represent your site’s mother keywords.
I prefer at least 10 contents to be posted on my website before it goes live.
You can get the contents ready before you launch the niche site. I you can follow my exact outsourcing method to hire writers.
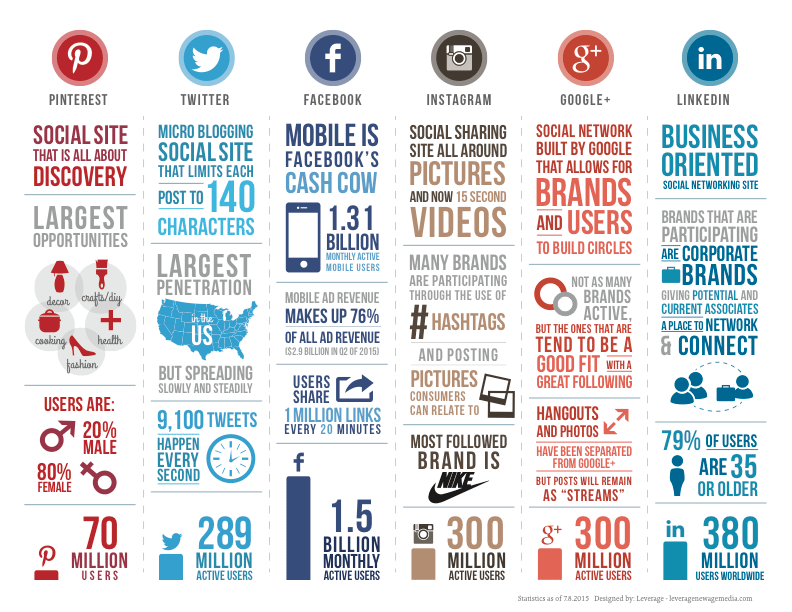
15. Create Social Media Profiles and Link Them From Site
Niche websites need to have real social media profiles to connect with the users. Social media branding is crucial for your site to gain the trust of the users and solve their problems in your niche.
You’ll do well to create Facebook, Twitter, Pinterest and Google Plus profiles of your niche beforehand and link them to your website from footer before going live with the site.
You need to promote it well on social media too. This helps in faster indexing as well as building up authority. There is a shortcut if you don’t want to spend much time. Check SocialKingo.com or UpTopSocial.com; they both provide social media marketing services that might come in handy for your niche site project.
16. Test The Performance and Make Sure Your Site Is Loading Super Fast
If your website is running slowly, you will see less time spent on your site by each user and bounce rate is pretty high (which negatively affects your SEO).
40% of people abandon a website that takes more than 3 seconds to load.
Site speed is even now a ranking factor for Google that you can’t afford to ignore.
Testing your site’s performance and speed before it launches will help you determine if any factor is slowing you down.
Two browser based speed testers that I like are Google Pagespeed and Pingdom, both of which will test speed for free.
If you want to optimize your WordPress site and make it super faster, read my complete guide on optimizing site speed here.
17. Create Your Sitemap
Having a good sitemap will help Google and other search engines index your site more easily.
Before your niche site goes live, make sure that you have a sitemap.
Yoast SEO plugin has a sitemap generator tool that you just enable and get your sitemap ready to submit to Google.
When building your sitemap, make sure to do it only for posts and pages. Exclude categories and taxonomies from sitemap, as these create duplicate content issues.
18. Setup Google Webmasters
Google Webmasters will help you do everything you need to do to keep your site optimized for Google’s search engine visibility.
You need the following information to develop further SEO strategy:
- Query
- Impression
- Clicks
- Click Thru Ratio (CTR)
- Average Position
How to get that?
Well… Google Webmasters helps!
With this mighty tool, you can see your website exactly how Google sees it. It gives you the insights of pages indexed from your site, links received, keywords you are ranking for and much more.
If you have a Google account, all you have to do is sign in on the link above and add your site’s domain name, and you will start seeing what you need to do further to verify and configure your Google Webmaters.
19. Setup Google Analytics
If you want to improve on your site, you need to know what’s working, and Google Analytics provides a whole lot of data to help you find out for free.
There is no reason not to use Google Analytics as this free tool provides:
- Detailed visitor profile (Number of visitors, average session, geographical data, language, and lot more)
- What visitors do on your website (session duration, page wise session details, which pages are performing best and worst)
- Traffic source (Source of traffic, referral website details, which source are performing better)
You can also check how to use Google Analytics data to increase your revenue from this infographic.
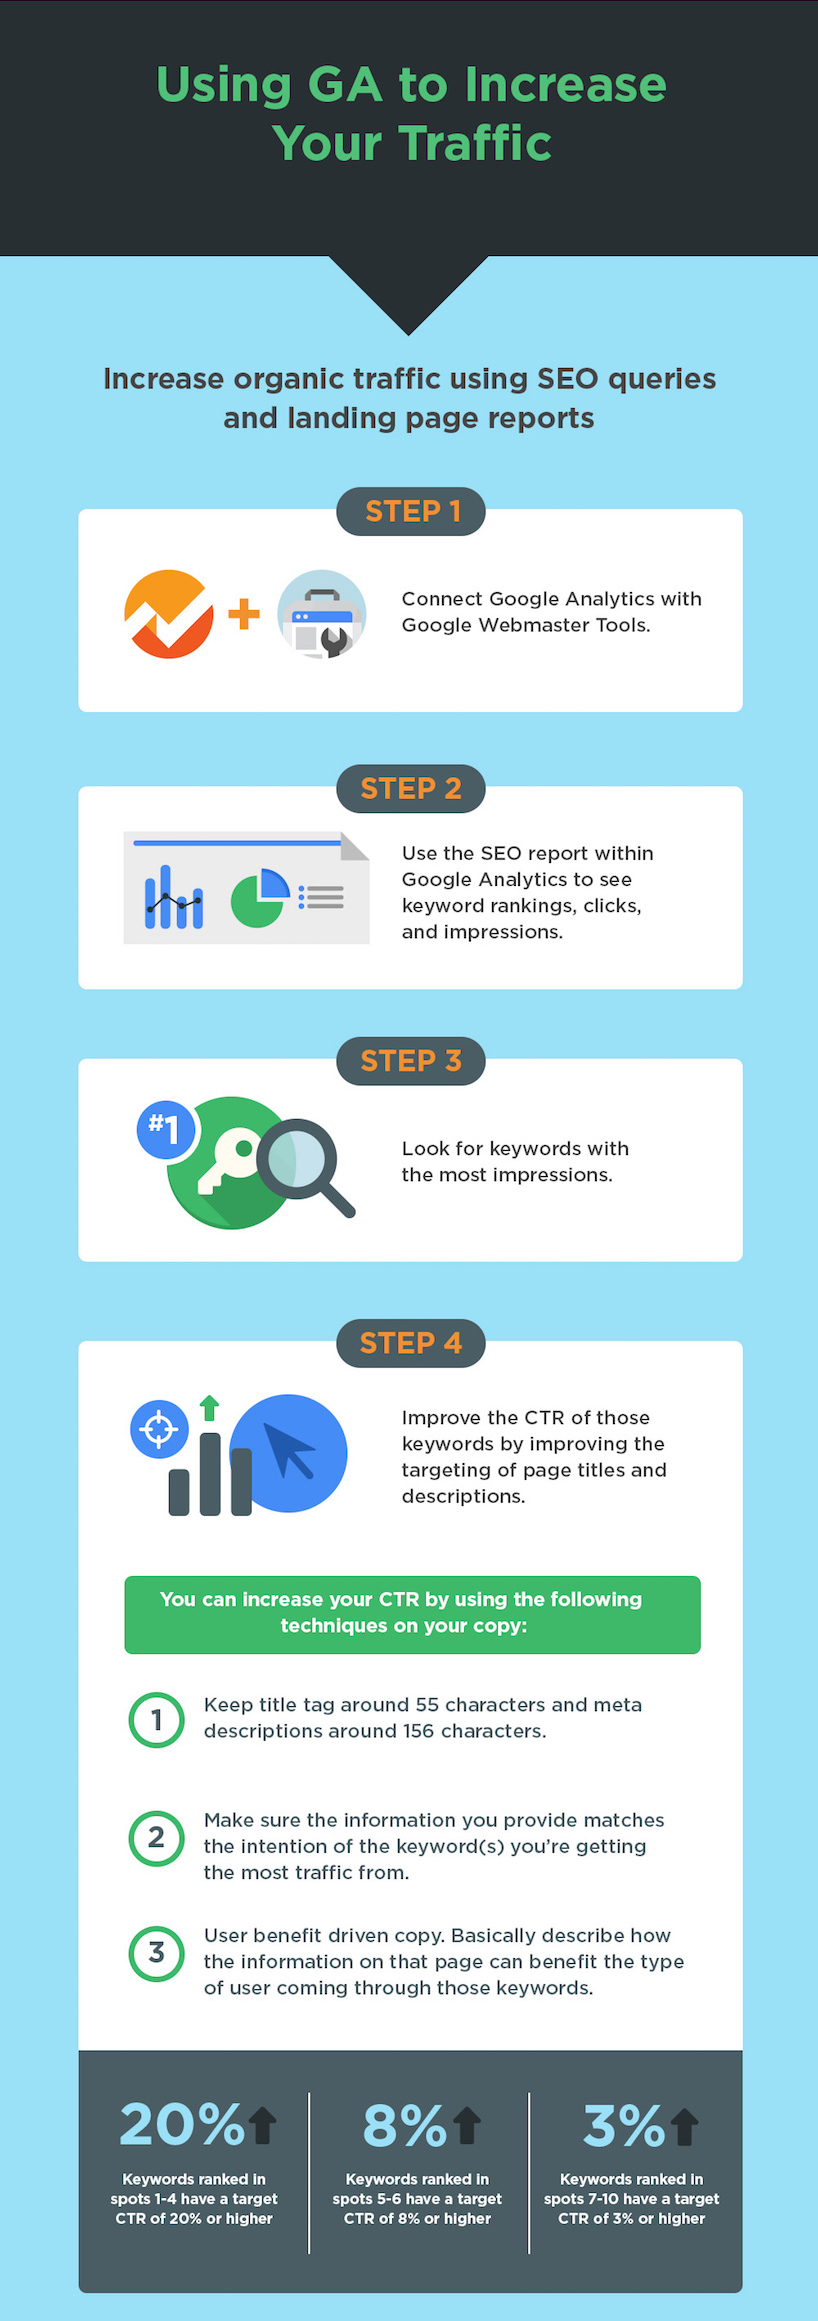
… you can also track your conversion and analyze more data from Google Analytics. It enables you to take decisions and improve your niche site.
Sign up for an account for free, and then follow the installation and setup instruction to get it done.
20. Check If Your Website Is Mobile Friendly
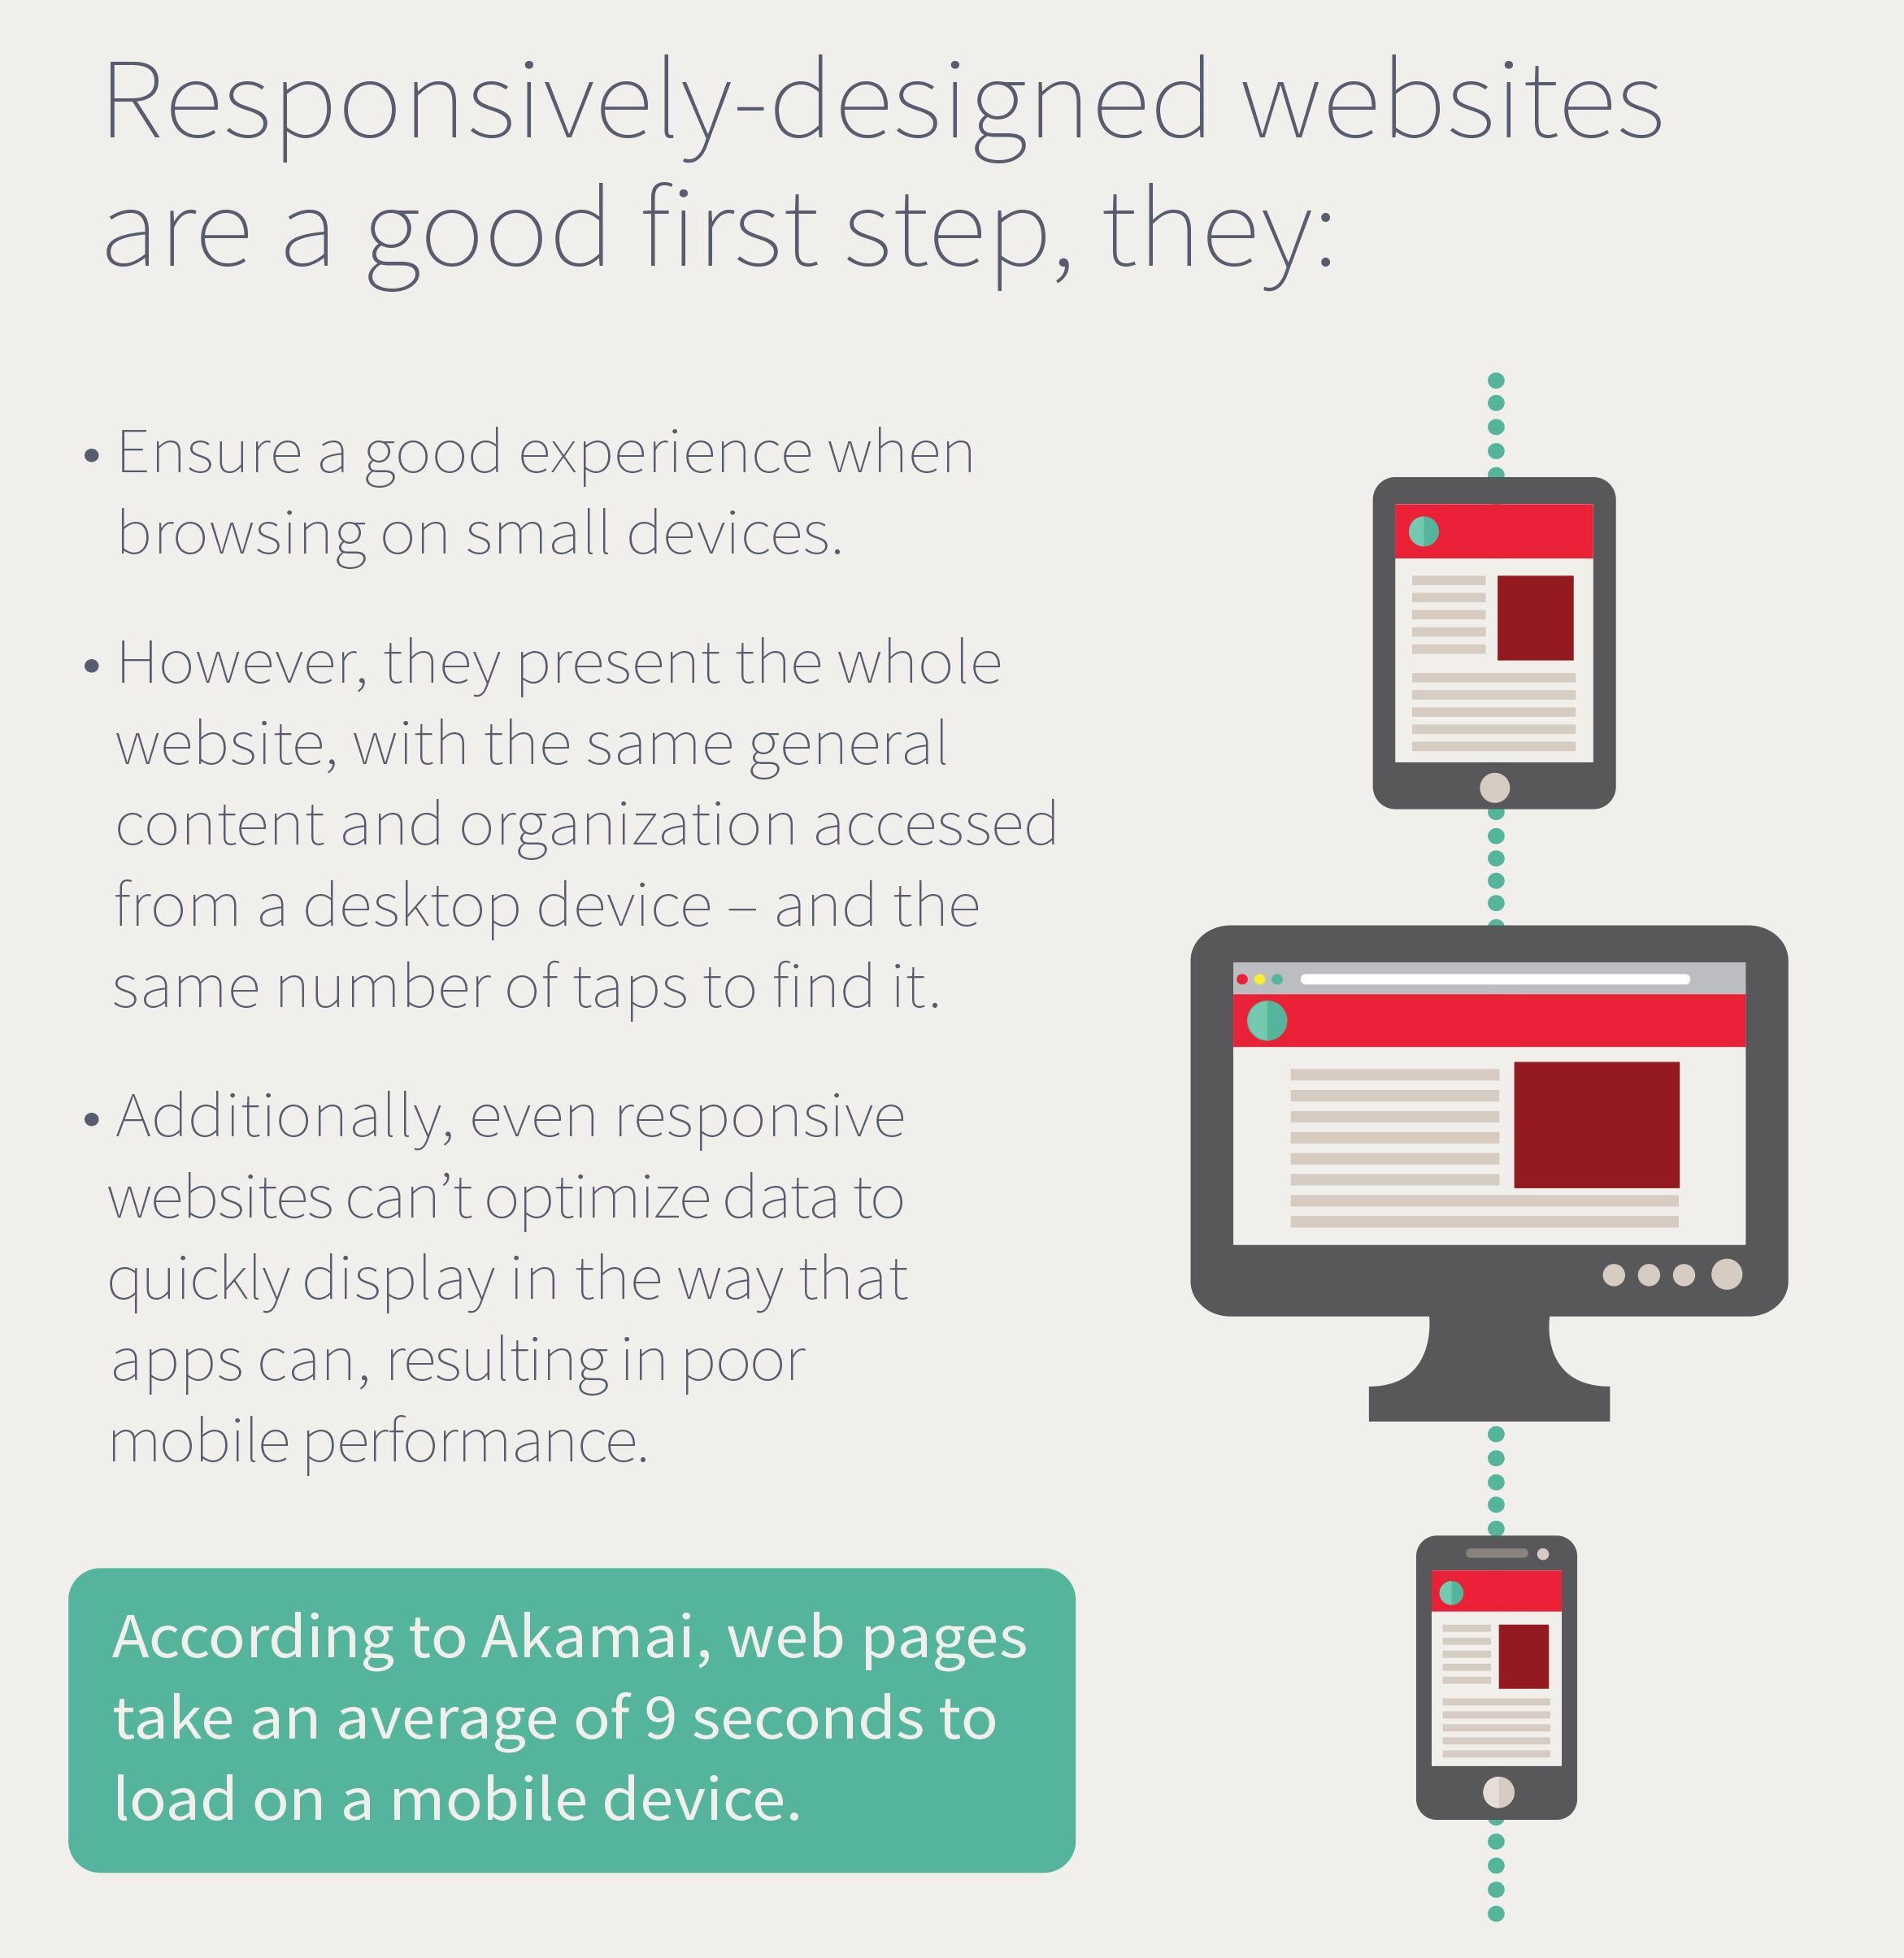
If your site doesn’t look good and work well on mobile devices, you are cutting off a huge number of potential customers. Checking your site’s mobile functionality before launching will help you assure that your earlier mobile visitors have a chance to turn into conversions.
There are many other reasons you need mobile friendly site:
I have a detailed post on selecting a perfect niche site theme, which are mobile friendly and works on almost every device.
To check mobile-version compatibility of your niche site, view it from as many different screens as you can before launching, just to see how everything looks.
You can also use this tool to check mobile-version compatibility of your niche site (my favourite).
21. Add Favicon and Apple Touch Icons
The more elements of your niche site are well-branded and consistent with your color schemes, the better.
By adding a favicon, you can make your niche site looks more professional.
… and setting your Apple Touch icons before launching, you help assure that anyone on an Apple device which saves your links or anyone who bookmarks your site will see icons consistent with your branding.
Here’s a good creation tool you can use to generate your website favicon.
Most of the WordPress themes now has the option to upload favicon. If the theme you are using doesn’t have the option “By default”, here is the detailed guideline on how to do it manually.
22. Includes an Amazon Affiliate Disclaimer in Footer
According to Amazon affiliate operating agreement, you need to put a disclaimer on pages where you put an affiliate link, else your Amazon affiliate account might get banned.
Your footer will be visible on every page of your site by default, so this is a great place to put your Amazon affiliate disclosure information.
In all my niche site, I also create a separate page where I put the affiliate disclosure in details and link the detailed disclosure from the footer.
You can edit your footer through your theme’s settings easily.
23. Make Sure the Site Displays and Functions in All Compatible Browsers
While the majority of your users will likely be accessing your niche site through the latest version of Chrome, Firefox, and Microsoft’s browser, there are still a lot of people browsing the web in other browsers.
And if you don’t make sure that your site works well with everything, including older versions of the most popular browsers, you may miss out on conversions.
Check your niche site compatibility in every browser using this tool. If any problem found, go get it fixed before your niche site goes live.
Your Turn
Completing all of the steps above will take a good bit of time, and may feel like a big chore. But if you skip any of these steps, you may just be causing yourself more work down the road.
Or, you may miss out on crucial early supporters and your first conversions. Check everything off of this list, and your launch will go much more smoothly.
Anything to add on this article? Share below in comment 🙂

Make sure robot.txt is not blocking “GoogleBot” . In some case I have seen people are use to block search engine while installing wordpress. Reason behind they were not sure when they could post their first article. 🙂 So this should be in checklist.
Thanks for the point, Ibrahim 🙂
Nice post bro. i have a question, should i active ‘under maintance’ plugin until post 10 articles? or just posting one by one article without blocking google bot? sorry for my bad English
Hi Mehedi,
You can block ‘Googlebot’ while installing WordPress, and when you have 10 posts in total, you can just unblock Googlebot from settings.
After that, setting up Google Webmasters will result your site to be indexed in Google.
Thank you for this valuable post.
Then can you please explain SEO steps and rank the Niche site?
Thank you again
I have some post on SEO. Please check them from blog index 🙂
Thanks bro , Got it !
Thanks a lot bro for your very effective post on SEO.
Helpful post, what is your opinion about All in one SEO plugin?
All In One SEO plugin is not update for years. So I’m no more using the plugin, instead Yoast SEO is my # 1 choice now.
Thanks
Thanks! Al-Amin Bhai, Really a necessary post.
Hi Kabir,
Care was taken creating your content. In fact, some would make it a paid course. Man, you rock!
I have only one thing that you should consider…
I was using Akismet but still getting spam comments. I later changed to Wp- Spam Shield which works best for me.
The Sky is the Limit,
-Tony
Thanks for the comment, Tony.
I’m glad that you loved my article! 🙂
Al-Amin, this is fantastic information. I have stripped my site down, and have been trying to rebuild it the right way, your checklist is proving to be invaluable in that process. Thanks for sharing this incredible post.
Cheers,
I’m glad to know you found my post useful, Ciaran.
Feel free to let me know if you have any question 🙂
it is very nice information.i got well counsel to know about link from you
Hi Al-Amin,
I just came over from your updates on the niche hacks and cloud living FB groups.
I must say that I am truly inspired and you have obviously found a fantastic formula that you use to build and rank your sites.
I would live to know more about your back link strategy for these sites.
Thanks
Al-Amin Kabir – you are a legend!!
I was just about to go live with my niche site, and I didn’t have any security, nor did I have Google analytics or even a bunch of the legal stuff sorted.
Now I have thanks to your article.
Bless you!
Josie
Great article and really useful check list to make any site healthy. thanks for sharing your thoughts.
I found your site by joining a facebook group which you are active in. I just want to say I’m thrilled to be one of your newest followers! I love how you lay everything out in a step by step format. It makes it so much easier for beginners such as myself to follow. Thank you for your work here!
Thanks a lot bro for your effective post. I am learning about Affiliate marketing from Google and Youtube. again thanks a lot for your good post. I want more article like this bro.
Al Amin Vai
This article help me much. I am implementing all these methods in my new niche site .
thanks for sharing this great article.
Outstanding articles, I never see such an informative articles on amazon niche sites.
Thank you, Al-Amin Kabir for your guidance!
Before all the steps, is the site should be in maintenance mode? If not that is it serious problem?
Nice article. Plenty of useful information. How about using Disqus commenting system? I started re-using it my blog recently and spam is completely gone.
Is there any bad effect on using Disqus on niche sites?
Hey man, this is a great article but I have a few questions regarding niche site building.
How to create an affiliate disclosure page for Amazon affiliates? Is there any tool to do it instantly?
And what is the best way to build backlinks to get the site ranked?
Please let me know as I am creating my very first niche site.